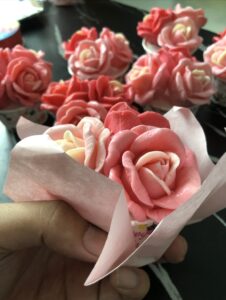
2. Flower wrapping paper, both plastic and mulberry paper
3. Color the ribbon according to the flowers.
4. Tall clear cake box
5. Jelly cupcakes 7 cups or 18 cups depending on the size of the bouquet
(Pictured will be 7 cup size) 6. Cutter
7. Plastic cup size 6-7 oz. 8. Beer crate paper or any crate
(If in case of a 6 oz glass
because it will make the bouquet and flowers look tighter and closer
9. Scotch tape, both small and large
# How to follow the picture below, you can see it.
If you have any questions, you can ask.
P.S. We set up prices for sell at our shop.
**********************
Students can use price for referent to set up price for selling . for the price will be different in each country
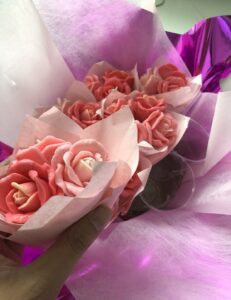
Preparing flower jelly in cupcakes ( Student can get recipes in lecture number 20)
2. Cut the paper in the same tone as the flower to wrap the cup.
3. Cut the paper in the same tone as the flower to wrap the cup.
4.- bring plastic glasses come together – Take a small piece of clear tape to stick together first. – Find the center of the first one and place them one by one until they surround the center glass. – Beginners ask for permission to recommend doing 7 glasses first. When entering the bouquet, it won’t be very difficult.
5. After putting a small tape on the glass, fix it around the first glass. – Bring a big clear tape (tape to cover the box) to wrap it in order to hold it tightly together and move again. Have to wrap it several times until it reaches almost the bottom of the glass. prevent it from moving
6. It will look like this. – Student can add another layer to make Size 21 Cup.
7. Then use the width of the surrounding glass (TOP SIDE) to measure paper crates then cut into circles
*** Don’t make it wider than the glass circle… As Because, it will be difficult to wrap.
8. Then use the width of the surrounding glass (TOP SIDE) to measure paper crates then cut into circles
*** Don’t make it wider than the glass circle… As Because, it will be difficult to wrap.
9. Take the glass that we have framed. Let’s stick to the paper base that we have already assembled. By using a glue gun to attach it around.
**Take it easy at this stage.
9. Take the glass that we have framed. Let’s stick to the paper base that we have already assembled. By using a glue gun to attach it around.
**Take it easy at this stage.
-10.Use wrapping paper to support. Color as you like. – Use the dark color tones before the light color. put the top layer
– When placing wrapping paper sheets, place the corners between them.
***The reason for using more mulberry paper We want the brakes to look dimensional.
11.all 3 sheets of paper and fold them up. Use clear tape to stick around the base of the cup.
– When flirting, grab each corner. which is the opposite corner
12. Use wrapping paper to support. Color as you like. – Use the dark color tones before the light color. put the top layer
– When placing wrapping paper sheets, place the corners between them.
***The reason for using more mulberry paper We want the brakes to look dimensional.
13. Use a ribbon to tie a line. – Please attach the clear tape to the back before tying it together.